New construction homes in the UK offer a variety of nice benefits:
- Lots of insulation, reducing heating bills.
- A well designed home which is suitable for 21st century living.
- A warranty for any defects (big or small) in the house’s construction.
- A home that often sells easier – when you come to move than other homes (most people prefer buying newer houses).
But the backyard is not one of the benefits. If you’re lucky, the housing contractor will lay a few paving slabs.
The problem, and the ‘before and after’
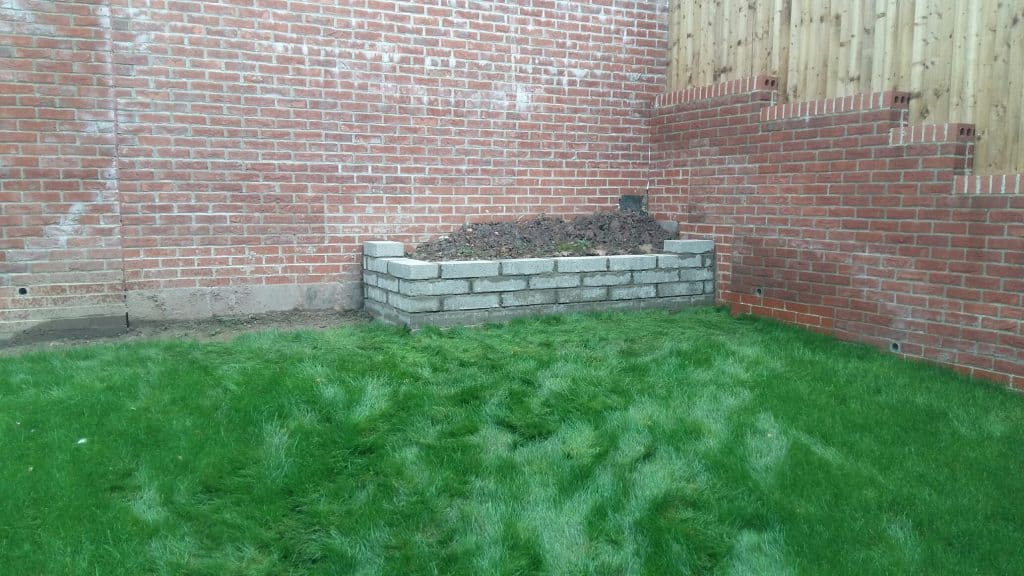
However more often than not, when you move in the backyard will be something like this:
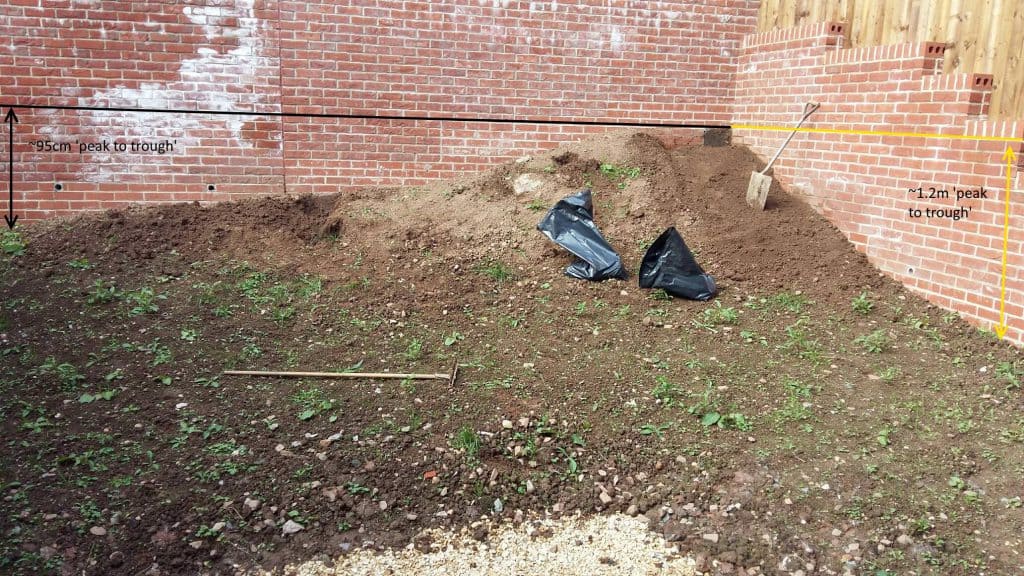
Ours was a bit of a special case because our neighbor’s garage is at the rear of our backyard, leading to the big build up of soil that you can see above. (Note: we were aware that there’d be this soil pile before buying the house).
As a result, after moving in I set about levelling the backyard as best as I could. I removed tonnes of soil, but I quickly uncovered an issue in the back right of the garage (by where the big wall for our neighbor’s garage was):
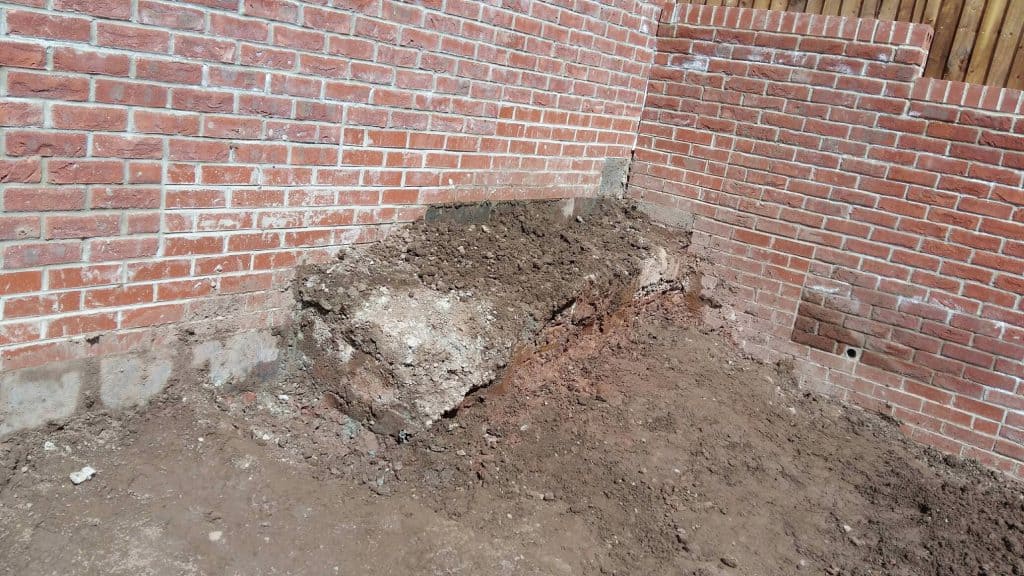
Okay, so I couldn’t go about smashing down these footings for obvious reasons! Hence I resorted to plan B: making a flowerbed (or planter) out of it:
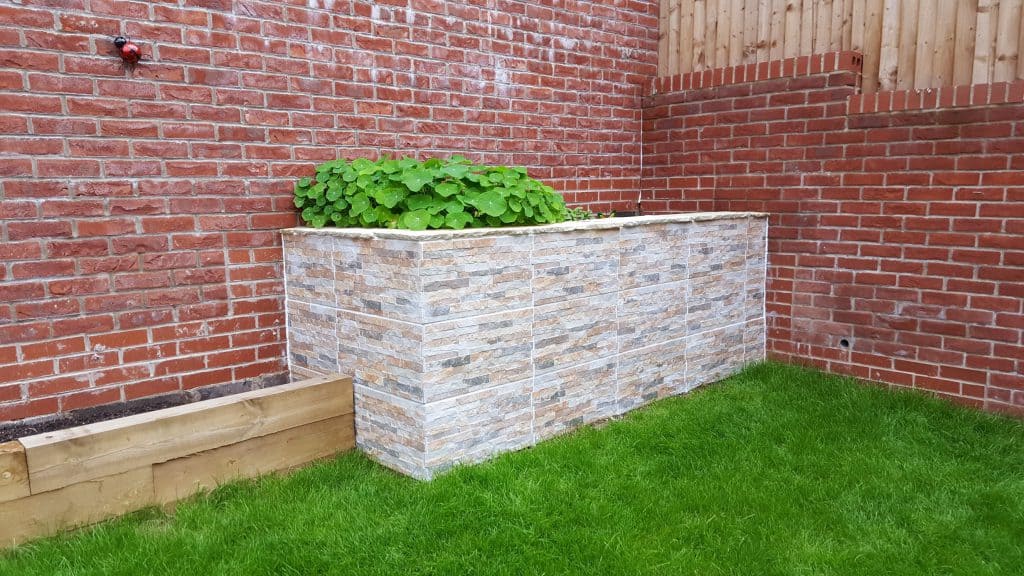
I’m quite happy with the end result, so I wanted to document it in today’s project log. Unfortunately I didn’t take any videos or loads of photos when I did this project, but hopefully I can cover the key parts of this project.
You can check out a slideshow version of this post right below, or please read on for the text-and-picture version instead:
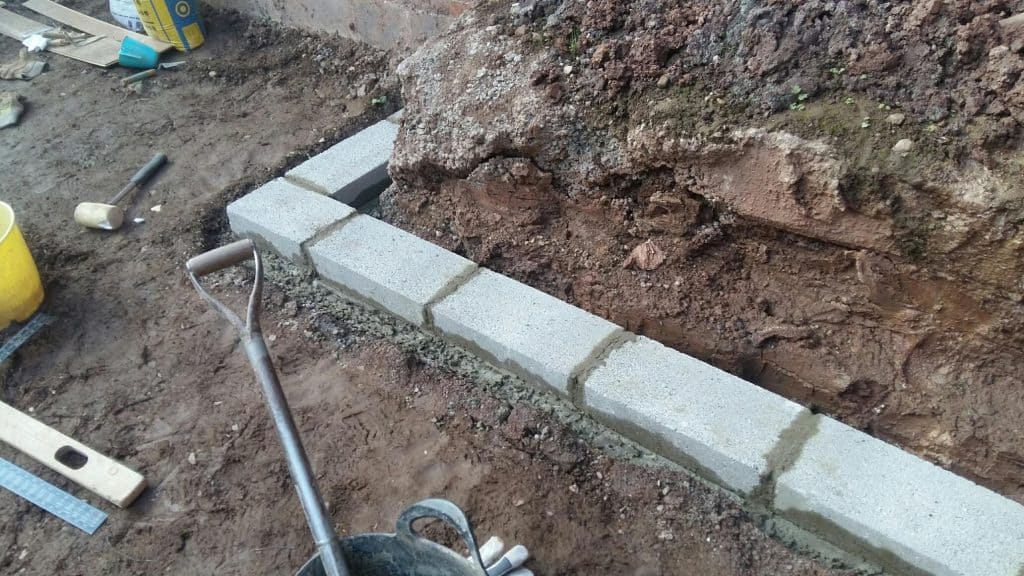
Step 1: the footings
I wanted this flowerbed to be fairly sturdy, especially since it would be holding back a fair amount of soil.
As a result, I decided to build it out of concrete breeze blocks – meaning I needed some footings. It didn’t need anything major, but I dug down 6″ or more:

After digging a bit more, I started mixing up concrete using the standard approach: sand, aggregate (small gravel) and cement.
I mixed it all up by hand which… wasn’t fun. It took ages, and I sprained my wrists for weeks. Maybe I’m just weak – who knows!

At this point, I then laid the first course (row) of breeze blocks – making sure that everything was as level as possible.
Step 2: laying the concrete blocks
I’m… not a perfectionist, but I did my best to take my time and level it:
This was the first course of wall I had ever built – woohoo! And 4 years on, it hasn’t fallen down so I clearly didn’t do too badly!
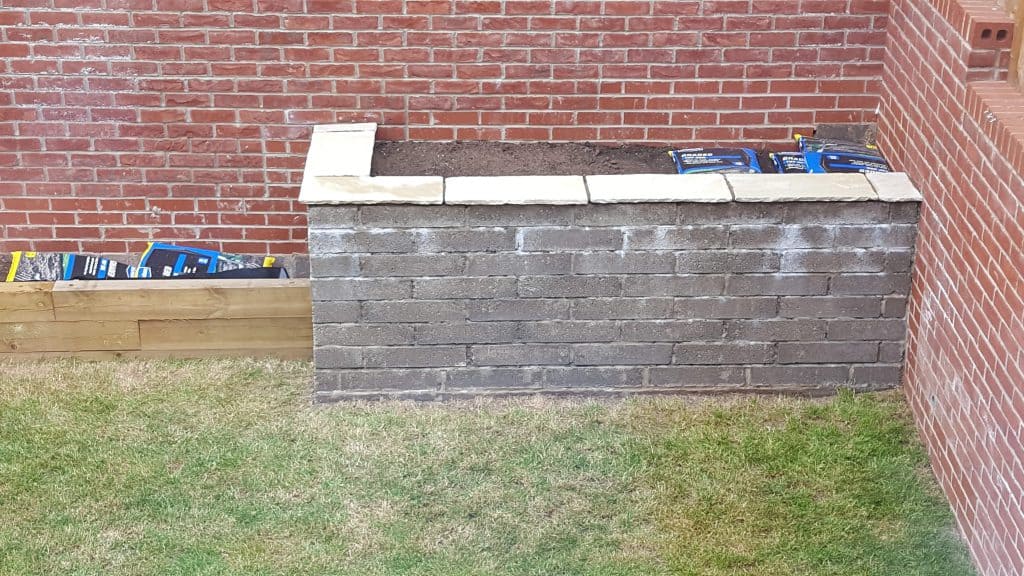
After this, I spent some time getting the rest of the backyard sorted (I lay turf grass, and added a path up the side). Then I carried on adding more courses and eventually finished the wall:

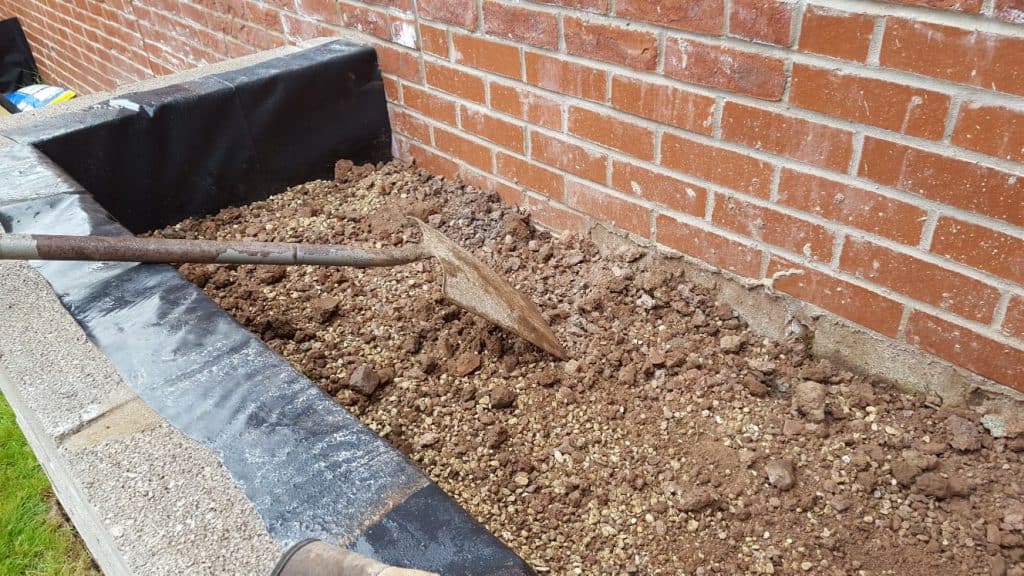
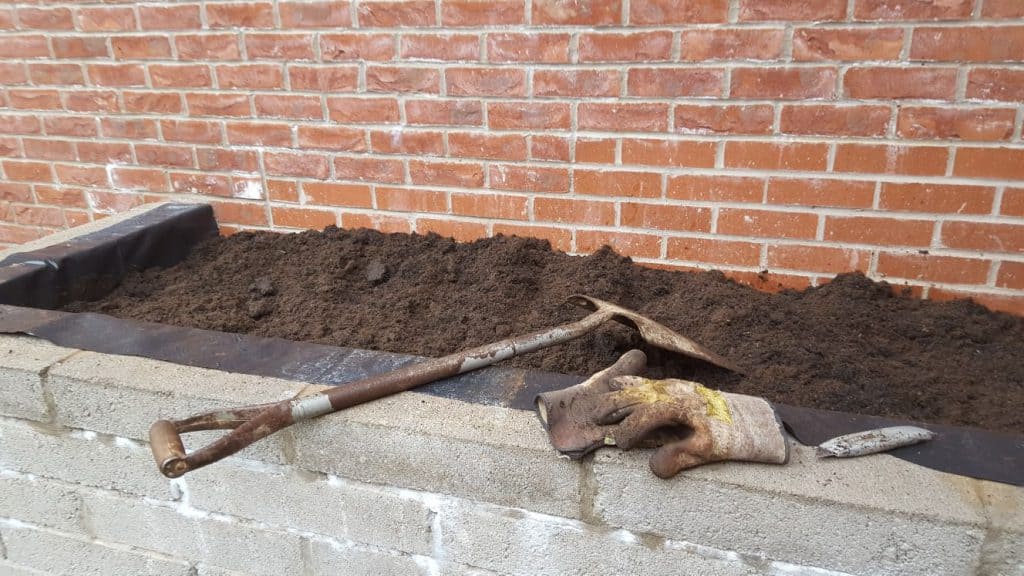
Step 3: topping up the soil
At this point, I then lined the inside of the flowerbed with a damp proof membrane and I then started topping up the soil:
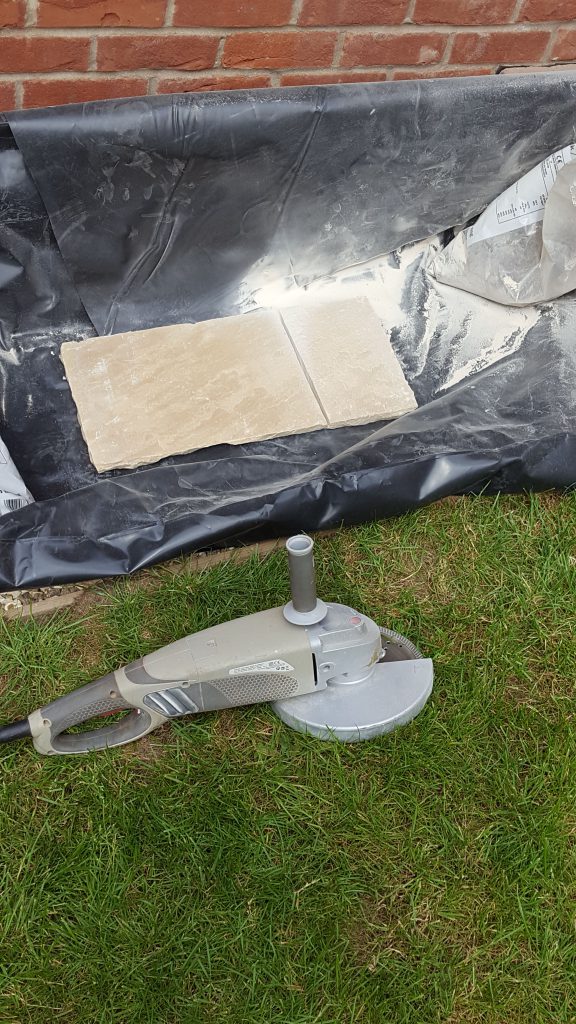
Step 4: the top coping (finishing) stones
I then stopped for the year (it was late September and the weather had turned). Early next year, I cut the coping stones and finished off the top of the bed:
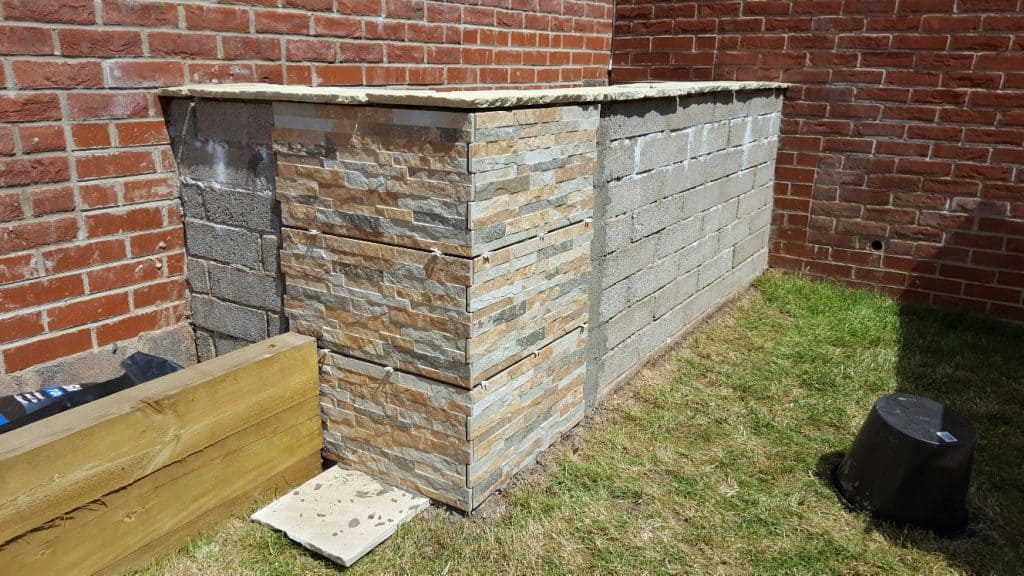
Now it was time to finish off the flowerbed – instead of staring at the boring grey concrete blocks! I looked at decorative stone, but that would have been a complete pain. I’m not good enough with mortar to do a good job, so instead I decided on tiling it with outdoor porcelain tile.
Step 5: tiling
Overall this went well, but it was difficult at times because the concrete blocks weren’t 100% level so I was sometimes having to apply different depths of tile adhesive. This isn’t always recommended, but it worked well enough overall.
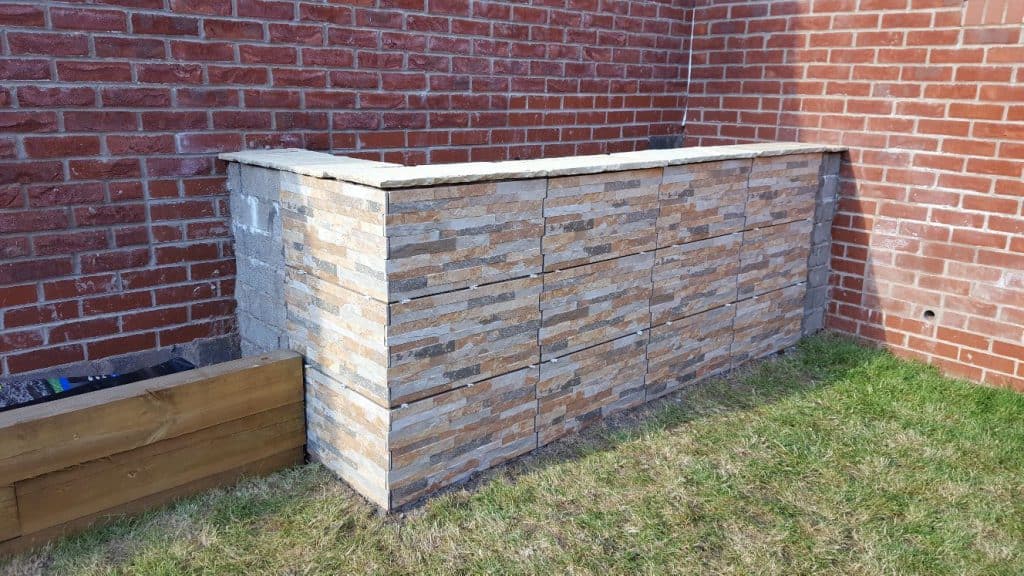
Once all the tiles were completed, I started grouting it:
And then it was just a case of finishing off the grouting, applying some white outdoor silicone sealant along the edges and the job was complete:
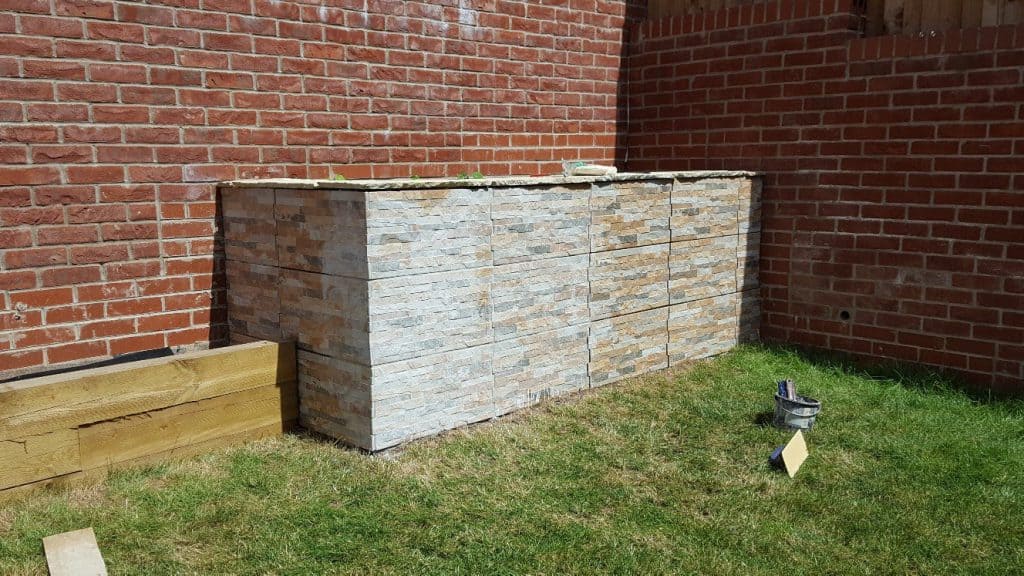
Yes I still needed to clean off some of the grout haze, but as I say, I’m not a perfectionist!
Overall I’m happy with the end result though. Whilst we couldn’t level the soil here, making a useless space into something useful and positive seemed better than simply having level soil here.
What do you think?