We previously mentioned how you can build a deck on top of a drain or manhole and we mentioned again and again how it is essential that you use treated wood if you are using timber. There are so many wood types that you can consider when it comes to building a deck or a shade, but not all of them are exactly wallet-friendly.
Wood price increases quite a bit after it’s treated. So a common alternative people often find themselves considering is using untreated wood. But can you build a deck with untreated wood? Is it a good idea or is it a disaster waiting to happen?
Yes, you can use untreated wood to build a deck, but not without preparing it first. You can’t, of course, pressure treat it yourself, but you will need to seal; the wood and stain/paint it to ensure the wood is ready to take on the harsh external weather.
Can I Build A Deck With Untreated Wood?
The problem with the untreated wood outside is that it will perform its function as it should for a while, but if you continue using it without according the same as per the use and environment, you will end up rotting the wood, inviting termites to your home, or worse, decrease the overall integrity of your structure.
In turn, this will lead to you having to incur extra costs when repairing the damage or even mitigating risks. It is essential that you are quick to treat the untreated wood.
Building a deck with non-pressure treated wood requires sealing and waterproofing – especially if you’re using the same outside. It is important that you consider what you are going to use the wood for and what it might be exposed to.
Some issues that you are likely to face with untreated wood include;
Water Damage
This is perhaps the biggest problem you’ll have to face. If your deck is going to be exposed to water from rain or simply from your sprinkler system, you will have to make sure it is waterproof. As soon as the timber starts getting exposed to water, you will not just find that the wood starts rotting, chances are that mold will also start growing and eating up the rest of the timber as well – even if it isn’t exposed to water.
The best way to protect non-pressure treated wood from water damage is to seal it using a good seal. Depending on where you live, sealers for wood will vary. However, here is a list of some of the most recommended outdoor wood sealers.
- Thompsons WaterSeal
- Rain Guard Premium
- Defy Crystal Composite
- Anchor seal 2 Logs and Lumber
- Eco Advance Exterior
- TotalBoat Lust Marine Varnish
These are just recommendations, so feel free to choose one that your think suits your needs best. The goal is to form a protective layer over the timber that fills all the perforations and protects against infiltration.
Sunlight
UV rays are an enemy to almost everything, given enough time. Both treated and untreated wood can degrade over time as the sun heats it up and changes the wood’s composition. It begins by draining the oil inside wood (the stain) and eventually reduces its integrity.
With time, the wood starts becoming brittle, and if exposed to anything else in the process, such as water, the damage done is double what it would have done to the original wood. Sun-damaged wood catches fire pretty easily, so keep that in mind.
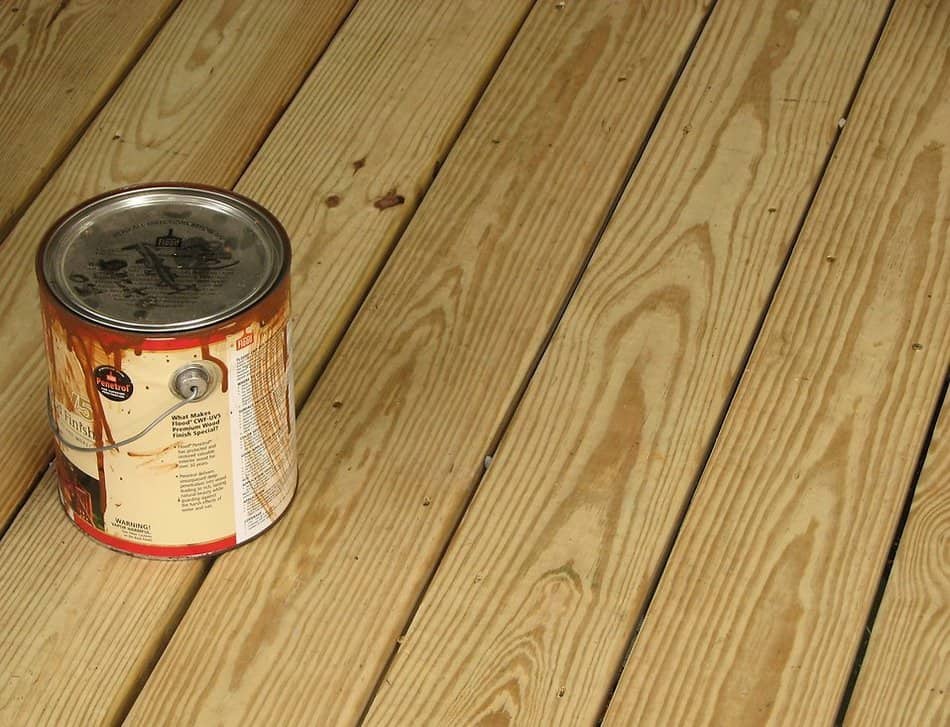
The best way to protect treated and untreated wood against the sun is to stain it. You may have to stain timber after every 6-8 years, depending on where you live. In sunny areas, 5 years and in colder climates, the stain can stay unharmed for more than 10 years!
So, Which Wood Is Best For Me?
There are many species that, even if left untreated, can survive the test of time and environment quite well (for a few years). Depending on which one you choose, the timeframe you have will also differ. However, if you are going to spend more, on wood such as Redwood, we would recommend you go for treated, cheaper wood.
Having said that, the heart wants what the heart wants, right? There are three wood species that you will find to be particularly resilient, even if untreated;
- Redwood,
- Cedar, and
- White Oak
- African blackwood
- Sandalwood
The thing about these wood species is that their structure is very accepting towards stains, seals, and varnishes.
Some of the worst wood species that you can choose to go with (untreated) for your deck include pine and hemlock. These are extremely perforated woods and are quick to retain moisture and therefore rot.
Pressure vs. Non Pressure Treated Wood – How Long Can They Last?
If you are looking to compare how long pressure treated and untreated wood lasts when used in a deck, we have tested it out for you. We used treated and untreated cedar in our deck and saw how long they would last.
Pressure-treated wood required maintenance every 10 years, but depending on the environment, the frequency can increase or decrease. We tested this in a relatively humid climate.
At the same time, non-pressure treated cedar lasts somewhere between 2 to 5 years.
Sealing Non-Pressure Treated Wood for Use in Decks – A Quick ‘How To’ Guide
If you have purchased non treated wood (or just got lucky and found some), and are looking to use it to make a deck, you will have to seal it to prolong its life. To start, make sure the wood is in good overall conviction and there are no signs of it rotting.
- Start by smoothing the surface with a sander, or use some elbow grease and use sandpaper. Start with 100 grit sandpaper (or 120) and move up to 250 and lastly to 400. Sand with the grain to avoid leaving behind any scratches.
Wear a facemask to avoid damaging your lungs with wood particles. - Remove any remaining dust with the help of a vacuum cleaner, or simply by wiping it down with alcohol. Use a tack cloth, if possible.
- Wait for the wood to dry up. Leaving it overnight should do the trick.
- Use a dry tac cloth again to clean up the surface. Tap the wood a few times to ensure there are no particles hiding in nooks and crannies.
- If you’re using a seal, pour a bit in a cup, dip a good quality brush and start painting. Make sure you stroke it in one direction and try to start from one end and continue the smooth motion until you reach the other.
- If you miss a spot, don’t patch it up! Cover it on your next pass.
- Try not to overlap, but don’t leave any stroke marks or gaps between strokes, either.
- Wait for 16 to 18 hours and apply the next coat. Two to three coats should be more than enough to seal the surface of the wood.
- If you’re using a varnish, pour it in a cup and dilute it 3 parts to 1 (3 parts varnish, 1 part kerosene or petrol, kerosene is better). Use the same, smooth brush motion to apply the varnish. Don’t apply more than 2 coats of varnish. If you think 1 is enough, let it be.
Staining Non-Pressure Treated Wood for Use in Decks – A Quick ‘How To‘ Guide
When it comes to staining, the process is slightly different from applying a seal because a seal doesn’t exactly ‘absorb’ in wood. It dries up and hardens. Stains, on the other hand, seep into the perforations between wood fibers and block the holes, coloring the wood in the process.
Remember, the best way to stain is to use oils instead of synthetic stains.
- Start by sanding the wood smooth. Again, sand with the grain to avoid scratches.
- Clean the dust off and wipe away all the dust. Do not use alcohol wipes here. Just a tac cloth and vacuum cleaner combination should work perfectly.
- Pour some stain right on top of the wood. Do not over pour. Remember, the wood will continue to absorb it and change color. If you aren’t comfortable pouring it directly on the wood, dip your brush. Don’t drain the brush before applying it to the wood, though.
- Spread it evenly. Stain oils are relatively easy to spread.
- Wait for the coat to dry. It should take an hour to show its true color. If you aren’t satisfied and want a deeper color, apply another coat.
Remember, a stain is only suitable for protection against UV rays. To make sure the wood has a long life, apply a seal or varnish as well.