Are you looking to install a new wiring system in your home or office?
Do you want to make sure the job is done right, but don’t know how?
Connect 6 gauge wire in junction box can be intimidating, but it doesn’t have to be!
In this blog post, we’ll walk you through the process and provide helpful tips for a safe and successful installation.
What Is 6 Gauge Wire?
6 gauge wire is a type of electrical wire used in various applications such as residential wiring, automotive wiring, and industrial wiring.
These wires are commonly used for heavy-duty electrical wiring applications, such as powering large motors and appliances.
These wires are composed of bare or insulated strands of solid or stranded copper, and the insulation is rated for specific temperature and voltage.
The 6 gauge wire is suitable for use in both residential and commercial installations, and it is important to know how to correctly connect them in junction boxes.
6 gauge wire is one of the most commonly used types of electrical wiring because it offers good flexibility, durability, and can be used for both indoor and outdoor applications.
It is also popular because it has a relatively low resistance, meaning it can handle higher current than other types of electrical wire.
6 gauge wire is typically found in junction boxes, outlets, and switches, as well as being used for long-distance runs in residential and commercial buildings.
How To Connect 6 Gauge Wire In Junction Box?
Connecting 6 Gauge Wire in a junction box is a simple process, and can be done quickly with the right tools.
First, you will need to select the right junction box for the job. It should be waterproof, and big enough to fit all the wires you will be connecting.
Once you have selected your junction box, you will need to prepare it by attaching the connector.
Once that is done, you can begin connecting the 6 gauge wire.
To do this, you will need to loosen the screw on the connector and insert the wire into it.
Then, tighten the screw and wrap the wire with a cap or nut for extra security.
After that, all that’s left to do is to connect your other wires in the same way.
Following these steps will ensure that your 6 gauge wire is securely connected in your junction box.
Step 1: Selecting Right Junction Box
To connect 6 gauge wire in a junction box, the first step is selecting the right junction box.
This is important because different wires require different sizes and types of junction boxes.
It is important to choose an appropriate size and type of junction box for the specific wire being connected.
A 2 x 4 x 1 12 inch can only splice two wires.
While a junction box measuring 4 x 4 x 2 1/8 inches can accommodate up to six cable wires.
For your 6 gauge wire connection, it is preferable to get the largest junction box.
In order to keep rain or other moisture from getting into the junction box if your installation will be outdoors, you need obtain a waterproof junction box.
For 6-gauge wire, there is a junction box available for purchase.
Once the right size and type of junction box have been selected, it can then be prepared for installation.
Step 2: Preparing The Junction Box
In the second step to connect 6 gauge wire in junction box, you need to prepare the junction box.
First, turn off the power from the main circuit breaker in your home.
Then, remove the faceplate of the junction box and inspect it for any cracks or damage.
Remove two of your junction box’s knockouts with a plier to make a spark containment.
This is crucial so that any spark or fire threat in the junction box does not escape into the open.
After that, make sure the wiring is secure and there are no exposed wires.
Finally, connect the wires to their respective terminals in the junction box.
This will ensure that your connection is safe and secure. Make sure to tighten all screws securely before proceeding with the next step.
Step 3: Installing The Junction Box
In the previous steps, you have selected the right junction box and prepared it for installation.
Now it is time to install the junction box.
It is important to make sure that the box is properly secured in place.
You may need to use a drill and screws or a wall insert to make sure that the box is securely mounted.
Make sure that the box is level and firmly attached before moving on to the next step.
After the junction box is installed, you should check all of your connections, making sure that everything is secure and properly connected.
Step 4: Securing The Connector For Your Junction Box
Once you’ve chosen the appropriate junction box for your 6 gauge wire and prepared it for installation, the next step is to secure the connector for your junction box.
The connector is used to hold the wires together and to ensure a strong electrical connection.
Depending on the type of connection you are making, you may need to use a split bolt, cambric tape or a butt connector.
For example, if you are connecting two pieces of 6 gauge wire, you would need to use a split bolt to secure them together.
You will then wrap the wires with a few turns of cambric tape and finish off with a bunch of turns.
This will ensure that your connection is secure and will prevent any shorts or open circuits.
Make sure to follow all safety guidelines when securing the connector for your junction box.
Step 5: Connecting The 6 Gauge Wire
In Step 5, you will need to connect the 6 gauge wire.
The best way to do this is by using a butt connector.
This is a barrel that has been crimped on both sides of the conductor to join the conductors.
Once the butt connector is in place, you can use a screwdriver or pliers to tighten the screws and secure it in place.
Make sure you have the correct size of connector for the 6 gauge wire.
Once the connection is secure, make sure to wrap it with electrical tape or a cap or nut to protect it from coming loose.
It’s important to follow safety guidelines when connecting any electrical wires and make sure all connections are tight and secure before turning on any power source.
Step 6: Tighten The Screw
Once all the wires are connected and secured with their respective wire nuts, it’s time to tighten the screws.
In Step 6, use an appropriate sized screwdriver to securely tighten the screws on the junction box.
Make sure that all the screws are tight enough to keep the wires secure and prevent them from coming loose.
Once all screws are tightened, you can proceed to Step 7 which is wrapping the wire with a cap or nut.
Step 7: Wrap The Wire With Cap Or Nut
Once all of the wires are connected, it’s time to secure them.
For this step, you will need a wire cap or nut.
These are used to cover the splices and protect them from damage.
Depending on the type of junction box you are using, you may need to use a different connector.
For example, if you are using a waterproof junction box, you may need to use a waterproof cap or nut.
Once the cap or nut is in place, make sure it is tightly secured by giving it a tug.
This will ensure that the connection is secure and protected from the elements.
Sizes and wire nuts are color-coded.
Therefore, you must choose the appropriate color code size to calculate the correct size for your 2-6-gauge wire.
The blue wire nuts are the suggested size for two 6-gauge wire connectors.
The white, yellow, and red nuts are additional color codes for your information. However, these are for various sizes.
Important Safety Tips for Connecting 6 Gauge Wire in Junction Box
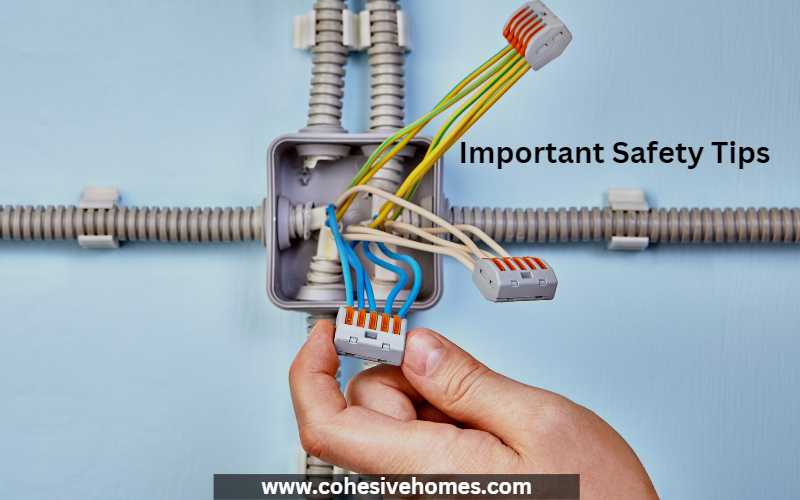
When connecting 6 gauge wire in a junction box, safety should always be your top priority.
Before beginning the installation process, make sure that the electricity in the area is off and that you are wearing safety goggles and gloves.
Additionally, make sure that the junction box you select is the right size to accommodate your 6 gauge wire.
When installing your junction box, be sure to secure it firmly to the wall or ceiling using the appropriate screws or nails.
Make sure that all connections are secure and that there are no gaps between the junction box and the wall or ceiling where wires can be exposed.
Finally, when connecting the 6 gauge wire, make sure that all connections are tight and secure.
Following these safety tips can help ensure a safe installation of your 6 gauge wire in a junction box.
Tools Required for Connecting 6 Gauge Wire in Junction Box

To connect 6-gauge wire in a junction box, you will need the right tools for the job.
You will need a 6″x6″x4″ junction box and flush cover, butt connectors, crimp tool, wire strippers, screwdrivers, electrical tape and a voltage tester.
It is important to ensure that all the tools you use are of good quality and in working condition.
Additionally, it is recommended to wear safety glasses and gloves when working with electrical wiring to protect yourself from potential hazards.
Following these simple tips can help keep you safe while completing your project.
How To Splice 6 Gauge Wire?

Splicing 6 gauge wire can be done by using an insulated set screw butt splice.
Insert one wire in each end of the splice and then tighten the two screws on the connection mechanism.
Once all of the wires are connected, you should then wrap the wire with a cap or nut for additional safety and protection.
If you are using a junction box, it is important to make sure that it is large enough to contain all of the wires that you need to connect.
Additionally, you should use split bolt connectors to splice with and tape over the splices with Scotch 33 or 88 electrical tape before adding heat shrink over each connection.
Following these steps will ensure that your 6 gauge wire is securely connected and ready for use.
Using Outdoor Waterproof Junction Boxes
Using outdoor waterproof junction boxes is a great way to protect your electrical connections when working outside.
They are designed to be waterproof, dustproof, and shockproof so that they can withstand any weather conditions.
When installing an outdoor waterproof junction box, make sure to use screws or nails to attach the box to a stud, and the face of the box should be flush with the drywall.
It is important that you use an IP68 rated outdoor waterproof junction box for the best protection.
These boxes come in a variety of sizes, so make sure that you select the right one for your needs.
Additionally, you should use a wire nut to connect multiple wires when using an outdoor waterproof junction box.
Using a 6” x 6” x 4” Box with Flush Cover
Using a 6” x 6” x 4” junction box with flush cover is the perfect solution for electrical installations in commercial and general industrial applications.
This type of box is spacious enough to provide free space for all enclosed conductors and to easily accommodate 6-#14 or 5-#12 or 5-#10 wires, 3-#14 or 2-#12 or 2-#10 wires, and one 1-1/2″ deep device ground.
It also features cable clamps, light fixtures, and junctions.
Plus, the flush cover allows for a neat installation that is still accessible after it has been installed.
To ensure that everything is properly connected, use the appropriate tools and follow the recommended electrical installation codes.
Finally, to protect the connection from moisture, make sure to use outdoor waterproof junction boxes.
How To Connect #6 THWN Wire to #6 Romex
Connecting #6 THWN wire to a #6 Romex is a simple but important task for any electrical job.
The first step is to select the right junction box for the job.
It should be large enough to accommodate the wires and components you need, and have an adequate rating for the environment it is being used in.
Once you have your junction box, you will need to prepare it by attaching the appropriate connectors for your #6 THWN wire.
Make sure all of your connections are tight and secure before continuing with the installation.
After that, you can then connect your #6 THWN wire to your #6 Romex cable and tighten the screws on the connection securely.
Finally, wrap both cables with a cap or nut to protect them from any moisture or dirt that may get in. Following these steps will ensure a safe and secure connection between the two wires.
conclusion
connect 6 gauge wire in a junction box can be a daunting task.
However, with the right tools and proper safety precautions, it is possible to complete the job safely and effectively.
With the right supplies, you can use split bolts (Kearneys) for pigtails, wire nuts for connecting two 6 gauge wires, or a 6”x6”x4” box with flush cover to make the connection.
You can splice a 6-gauge wire or use an outdoor waterproof junction box if needed.
To ensure a successful installation and maximize safety, it is important to remember to use individual conductors when installing a circuit in a raceway wiring method.
And MICRO PUSH WIRE® Connectors for Junction Boxes when making multiple bends on the same pipe length.
Best Wishes!