Over the past few articles, we have extensively discussed the essentials of tiling and using grout in your DIY ventures. We mentioned how to install tiles in your kitchen but left out how you can keep them level, since this warrants its own article.
The question of how to keep wall and floor tiles level when installing is one that has been asked by masons and tile contractors for years now, and yet there is no easy, or a single universal way to do it. That’s the thing about this industry, ‘if it’s stupid and it works, it ain’t stupid.’
There are many ways to keep your tiles level, with one of the most popularly used ones being with the help of a spirit level. There are also some who use a vodka bottle, if you’re feeling up to it. Then there is the tried and tested string method. There are also tile level installation kits and self-leveling compounds that you can use. However, problems arise when tiling bathroom floors, kitchen, and floor roofs. Let’s discuss these in detail.
Starting Off – Having a Level Floor
All’s well that ends well, yes, but for a tiling job to end well, it needs to start well. Whether you’re looking to tile the floor or the wall, it is imperative that you make sure there are no inconsistencies in the surface.
Check for any dips, mounds, drops, or more before you even consider laying the mortar on top. You may think that these irregularities won’t amount to much and that you will adjust the mortar accordingly, but let us tell you from experience that this doesn’t happen.
If you see any ridges, we recommend you grind them down with the help of a power tool or use a hammer and chisel to break it down. Both are very messy procedures, but with the power tool, you get much more accurate results.
In our opinion, an angle grinder (the one we asked you to buy when installing tiles around kitchen cabinets) can make short work of this.
Next, start filling any dips you see. Mix the mortar with sand and fill the dips up. To ensure cost-effectiveness, add more sand in the mortar to build volume and then fill it up. You don’t need this bit to be filled with adhesive – just filler.
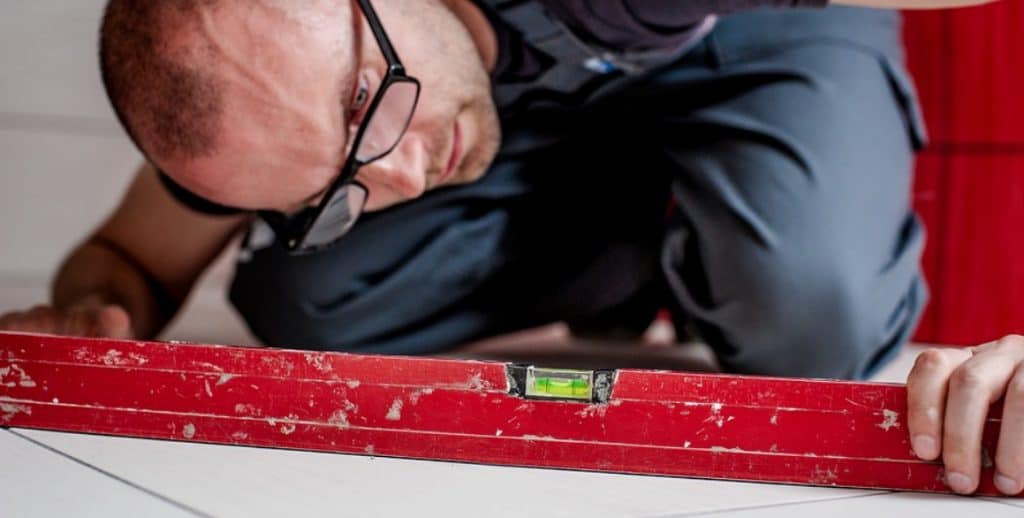
The industry recommends that you use a straightedge to determine the flatness of the floor or wall, but let’s be honest, not all of us have our hands on a straightedge, right? The goal is to place the straightedge on the floor and place a spirit level on top of it to see where you need to grind a bit or add some filler.
We simply picked up the first straight thing we found, which in our case was a 4-foot PVC pipe. You can go with quite literally anything that will retain its straightness when placed on the ground. For walls, you can consider hanging a thread with a rock at its end – go old school.
There is one very important consideration to make, though. If you are tiling a bathroom floor, you need to tilt the floor a bit to ensure that water flows into the drain and doesn’t end up forming puddles. However, that is not something you have to worry about when preparing the base floor.
How to Keep Wall Tiles Level
If you don’t have a spirit level, it might be time to buy one now. When installing tiles, spirit levels and mallets are extremely handy – especially when ensuring that everything is level. Keeping wall tiles level is actually a bit more difficult than floor tiles, considering you are working against gravity here.
If you apply self-leveling concrete on walls, you are likely to make a huge mess and at the end of the day, be unsuccessful. This is why some contractors also prefer using mortar directly on an uneven wall and with the help of the plain side of a tiling trowel, flatten it out. Hang a thread right in front of the wall to use as reference and maintain a specific distance from it throughout.
You can also use a spirit level here for more reliable results. Since this isn’t going to be front-facing, it is okay if your level leaves a small mark on the wall.
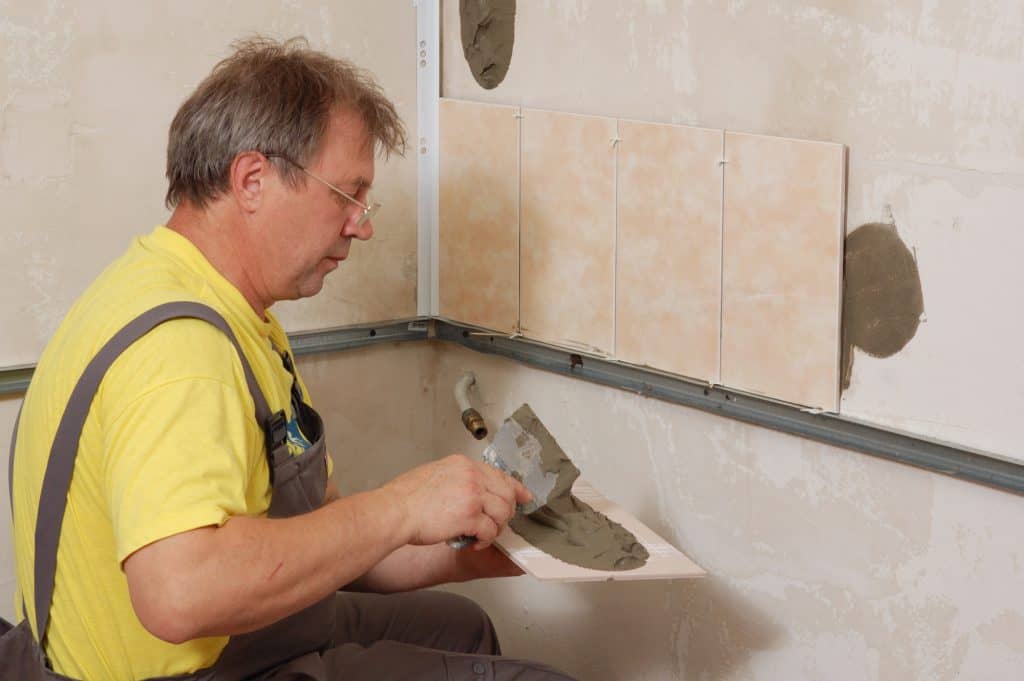
Once level and the mortar has dried, start laying the tiles. Place the spirit level flush against each tile when applying it and with the help of a mallet, push each tile in until it is level. Once you’re done with that, use a leveling kit.
The kit comprises of two parts. One; specialized ‘spacers’ that you place between tiles. These spacers lock adjacent tiles with each other. Then there is a wedge that you drive underneath the spacer itself. The wedge holds both tiles together and essentially ‘pulls’ the tile from underneath and ‘pushes’ it from above, effectively holding it in place.
Pro Tip: When laying tiles on any wall, use a pyramid structure to ensure that no tile falls off as you continue to add more and more.
These systems act as spacers and levelers together and are perfect not only for wall tiles but also for floor ones. Remove the same after 24 hours, after which the tiles are ready to be grouted.
How to Keep Floor Tiles Level
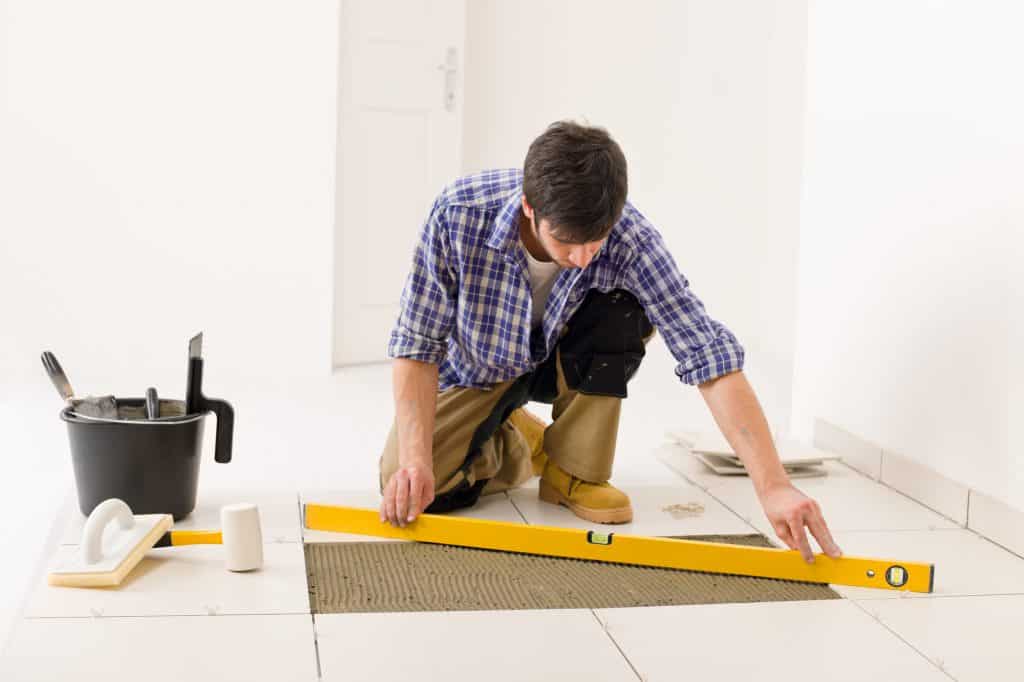
If you are working on floor tiles, keeping them level is much easier than when working on walls because here, gravity is with you. The best way to ensure that floor tiles remain level is to use self-leveling concrete to level the sub-floor first.
Self-leveling concrete has a concrete-like texture but unlike concrete, it is much less viscous, meaning it flows much more easily. Apart from that, it also cures quickly, which is a huge advantage. Due to its low viscosity, the concrete tends to flow freely and set itself in a manner as to be as level as possible. The concrete itself isn’t as strong, nor does it serve as a very good adhesive which is why it isn’t used directly for laying tiles.
Once the concrete has dried up (which should take from 1 to 6 hours, depending on the ventilation), you are free to apply mortar on the surface and start laying tiles, as you would normally.
Pour some mortar on the ground and spread it using a teethed trowel. Place each tile individually and with the help of a spirit level, level it out. If you are tiling washrooms, you will need to slope the surface a bit. The best way to do that is to lay a 1-inch thick layer of mortar on one and reduce it to ¼ inch as you move toward drains. Your spirit level should be slightly off.
As a rule of thumb, the dip should be at least ½ an inch every 12 inches.
Usually, it doesn’t matter whether you slope your sub-floor or not as long as you apply mortar accordingly. However, you will find many professionals who suggest that it is important to slope the sub floor as well. This is an argument that has been going on for quite a while now and we believe that it is simply a matter of opinion. No one is going to penalize or reward you for making the slope out of mortar or subfloor concrete.
Don’t forget to use spacers when laying floor tiles. Remember, spacers are more than just aesthetics – and with the help of a tile-leveling kit, you not only get to space your tiles evenly, you can also level it all in one go!