Are you an electrical enthusiast looking for a new project?
Are you a homeowner trying to tackle a DIY project?
Do you need to replace your old junction box but don’t know where to start?
If so, then this blog post is for you! We’ll walk through all the steps of replacing your junction box and show you how easy it can be.
What Is Junction Box?
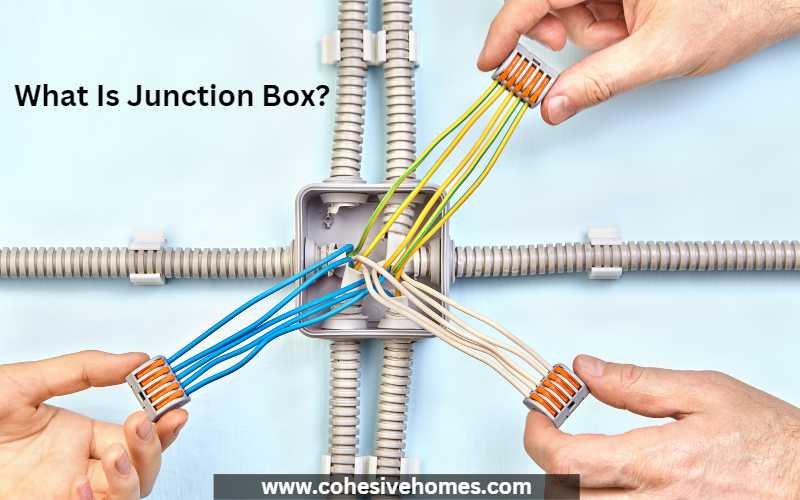
A junction box is an important component of a home’s electrical system.
It is a metal or plastic enclosure that houses the connection points between two or more electrical wires.
Junction boxes are used to protect the wiring and prevent any potential hazards that could arise from exposed wires.
They also allow easy access when making repairs, additions, or alterations to the electrical wiring.
Junction boxes come with either 3, 4, 5, or 6 terminals to complete your project.
The terminals are where the connections between the wires are made and secured.
Whenever replacing a junction box, it is important to ensure that all wiring is properly connected, secured, and compliant with local electrical codes.
How To Replace Junction Box?

Replacing a junction box is not a difficult task, but it is important to follow the proper safety precautions and do the job correctly.
First, be sure to turn off the breaker at the main electrical panel that supplies electricity to the ceiling electrical box.
Then, pull the electrical cable through the junction box, and install a plastic “old-work” ceiling junction box.
Use a voltmeter or non-contact circuit tester to check conductors and connect wires to the new junction box.
Seal any openings in the box with electrician’s putty, and secure it in place.
Finally, reinstall the light fixture or wall outlet, turn on the circuit, and test out the outlet/fixture. Be sure to adhere to local electrical codes when replacing your junction box.
You can get a clear knowledge on how to replace junction box by reading following steps.
Step 1: Turn Off the Circuit at the Main Service Panel
Before attempting to replace a junction box, the first step is to turn off the circuit at the main service panel.
To do this, locate the main circuit breaker or fuse box in your home and switch off the circuit that supplies power to the junction box you are replacing.
It is important to ensure that all electricity is shut off before starting any electrical work as it can be dangerous.
Once you have switched off the power, use a voltage tester or non-contact circuit tester to double check that there is no electricity running through the wires in the junction box.
Step 2: Pull the Electrical Cable Through a Junction Box
In Step 2, you will need to pull the electrical cable through a junction box.
Be sure to use an appropriate sized box for the number of wires that will be running through it.
Make sure to leave enough room in the box for the wire connectors and other components.
Before pulling the cable, make sure to turn off the circuit at the main service panel.
Inspect the cable for any damage, and if there is any, replace it before continuing with the installation.
Once everything is in place, you can secure the cable using an appropriate clamp or other fastener.
Make sure that all connections are tight and secure before continuing.
Step 3: Install a Plastic “Old-Work” Ceiling Junction Box
Now that the circuit is off and the old box has been removed, it’s time to install the new “old-work” ceiling junction box.
First, you need to make sure that the box fits securely in the opening.
You can do this by measuring the opening and then choosing a box with the same dimensions or slightly larger.
Then, depending on the type of box you’re using, you may have to cut out an area of drywall or plaster to fit it in.
Once it’s in place, use a mounting bracket or screws to secure the box in place.
Make sure to seal any openings around the box with electrician’s putty for added protection against moisture and dust.
After that, you can finally connect your wires to the new junction box and start putting everything back together.
Step 4: Use a Voltmeter or Non-Contact Circuit Tester to Check Conductors
In Step 4, it is important to use a voltmeter or non-contact circuit tester to check the conductors.
This will ensure that the conductors are actually disconnected and will help prevent any electrical accidents.
Non-contact voltage testers (also known as inductance testers) allow you to check for voltage in wires or devices without you having to touch them.
To test electrical wires and test if a wire is live, place the tip of the non-contact voltage tester against the wire or device and watch for a light or sound indication that there is electricity present.
Every tester is a little bit different, so be sure to read the instructions carefully before using it.
Once you are sure there is no voltage present, you can proceed with replacing the junction box.
Step 5: Connect Wires to the New Junction Box
Once the junction box is installed, the wires must be connected to it.
Start by turning off the circuit at the main service panel.
Then, remove the cover plate from the new junction box and connect the white neutral wires from each cable with a wire connector.
Secure each connection with electrical tape.
Next, connect the black hot wires from each cable to a grounding screw on the junction box.
Finally, join all of the ground wires in the junction box together and attach them to a grounding screw on the box.
Make sure all connections are tight and secure before replacing the cover plate of the junction box.
Step 6: Seal Any Openings in the Box with Electrician’s Putty
After connecting the wires to the new junction box, it is important to seal any openings with electrician’s putty.
Electrician’s putty is a special type of material that is designed to keep moisture and dust out of electrical boxes.
It should be applied around the edges of the box, as well as any open holes or gaps that could potentially lead to water or dust entering the junction box.
This will help protect your wiring and ensure that your circuit is safe for use.
Additionally, electrician’s putty provides a neat and professional look to your wiring installation project.
Step 7: Secure the New Junction Box to the Wall or Ceiling
Securing the junction box to the wall or ceiling is an important step in replacing a junction box.
Depending on the type of junction box you are using, you may need to hang it with a metal bar, screw it down with joists or use a flush mount with a drywall plate.
Make sure to use the manufacturer’s instructions and follow local building codes when installing the new junction box.
Once secured, you will be able to finish the installation process and restore power to the outlet or fixture.
Step 8: Reinstall Light Fixture or Wall Outlet
Once you have successfully connected the wires to the new junction box and sealed any openings with electrician’s putty, it is time to reinstall the light fixture or wall outlet.
Depending on the type of fixture you are installing, it will require different mounting techniques.
For example, if you are installing a ceiling light fixture, you may need to attach a hanging bar with studs and then mount the clip to the middle of the bar.
Similarly, if you are replacing an existing wall outlet, you must ensure that any open outlet boxes or unfinished wiring is properly secured and installed in a junction box.
Finally, make sure all devices, receptacles and light fixtures are properly installed and secured.
Step 9: Turn On Circuit
Once all the wiring is complete, it is time to turn on the circuit.
First, make sure that all the connections are secure and all of the wiring is properly insulated.
Then, turn the breaker switch in the main service panel back on.
Test the outlet or fixture to make sure that it is working properly.
If everything appears to be working correctly, you have successfully replaced a junction box.
Be sure to follow all national electrical codes when replacing a junction box to ensure safety.
Step 10: Test Outlet/Fixture
Once all the wiring has been securely connected, the circuit can be tested to make sure it is working properly.
The best way to test is to use a voltmeter or a non-contact circuit tester.
This will indicate if the circuit is live and if voltage is present.
If the readings are correct, then the light fixture or wall outlet can be safely reinstalled.
Finally, turn on the power and test the outlet or fixture to make sure it is operating correctly.
All of these steps should be done with safety in mind and according to local building codes and regulations.
It is always important to verify that all wiring is in compliance with national electrical codes before using any new junction box.
National Electrical Codes To Replace Junction Box?
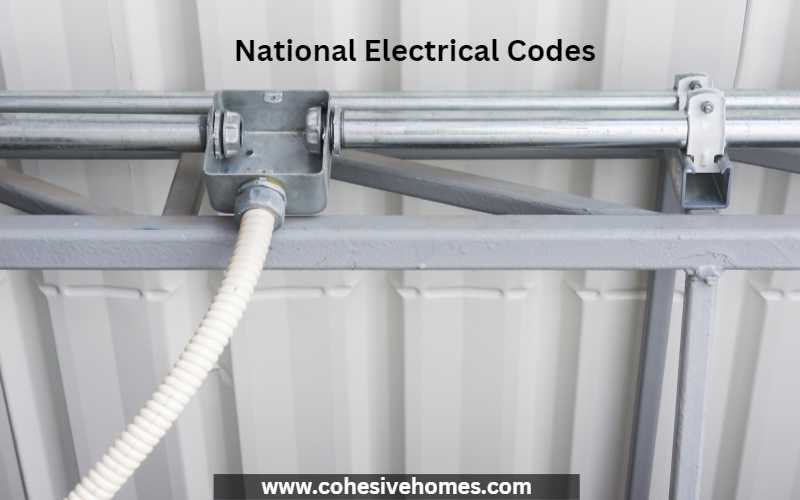
It’s important to follow the national electrical codes when replacing a junction box.
When preparing to mount the box, separate the circuit wires at the existing splice and loosen the cables as needed to make room for the new junction box.
Exterior boxes should be attached with screws; back of the box should have small holes for that purpose.
Make sure to use a voltmeter or non-contact circuit tester to check conductors before connecting wires to the new junction box.
Furthermore, seal any openings in the box with electrician’s putty and then securely attach it to the wall or ceiling before reinstalling the light fixture or wall outlet.
Finally, turn on circuit and test outlet/fixture to make sure it is safe and secure.
Following are the NEC requirements when replacing junction box
Junction boxes cannot be buried in the walls or ceiling.
Wrap the tape around both sides of the connection.
The required calculations are made using the cubic inches of the box, the connectors and the wires.
Attach the new connectors to the knockouts in the junction box, with the nuts on the inside of the junction box.
Use pliers to tighten the nuts on the connectors.
Screw the cover to the junction box.
Conclusion
In conclusion, replacing a junction box can be a challenging task for someone unfamiliar with electrical wiring.
It is important to make sure the power is completely shut off before attempting to replace any part of an electrical system.
Additionally, the National Electrical Code should be consulted to ensure the junction box is properly installed and meets all safety standards.
When in doubt, it is best to hire a professional electrician to replace the junction box.
Best Wishes!