As you are taking a look at your building, you may be wondering about the building techniques that went into it. If you have an older building, such as one built before 1950, it may have been built using a technique known as lath and plaster. Buildings that were built after 1950 usually use drywall. Even though there are some older buildings that have replaced lath and plaster with drywall already, this is not always the case. If you have a building that has been constructed using lath and plaster, should you replace these walls with drywall? There are several important points you should keep in mind.
What Is Lath and Plaster?
First, it is important to understand what lath and plaster is. This is an older building technique that was mainly used to finish ceilings and interior dividing walls. Usually, there are narrow strips of wood, called the laths, which are nailed horizontally along the ceiling joists and wall studs. Then, they are coated in plaster.
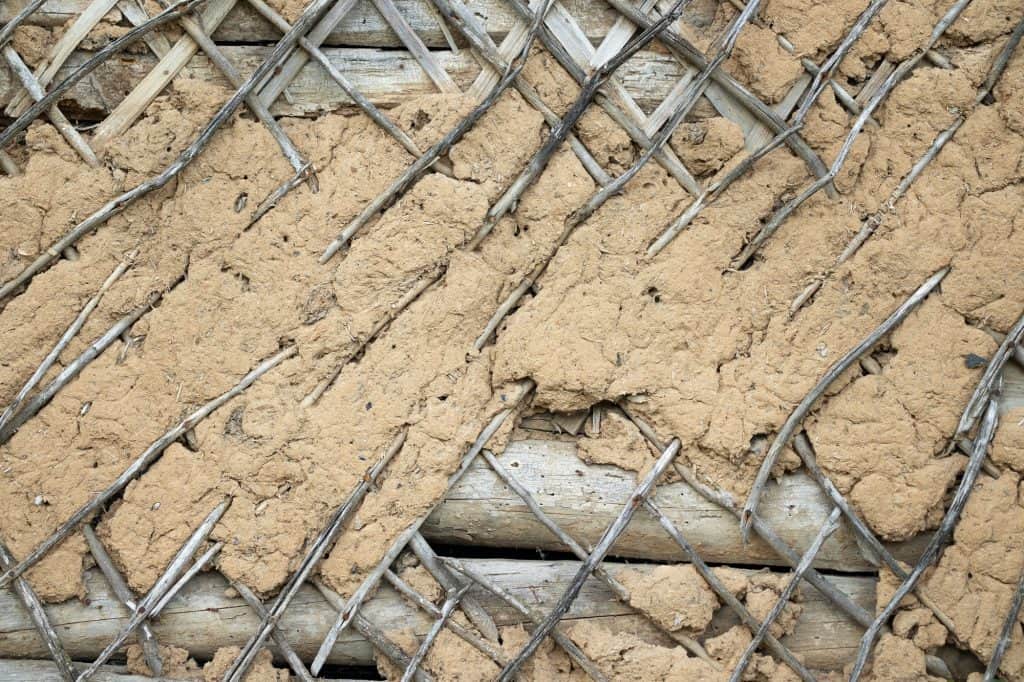
This is a simple building technique that is strong, cost-effective, and relatively quick. At the same time, this building technique has fallen out of favor as people go with drywall today. What are the benefits and drawbacks of using lath and plaster? Why would you want to replace this with drywall?
What Are the Top Reasons To Replace Lath and Plaster with Drywall?
There are several reasons why you might want to replace the lath and plaster model with drywall. A few of the top reasons include:
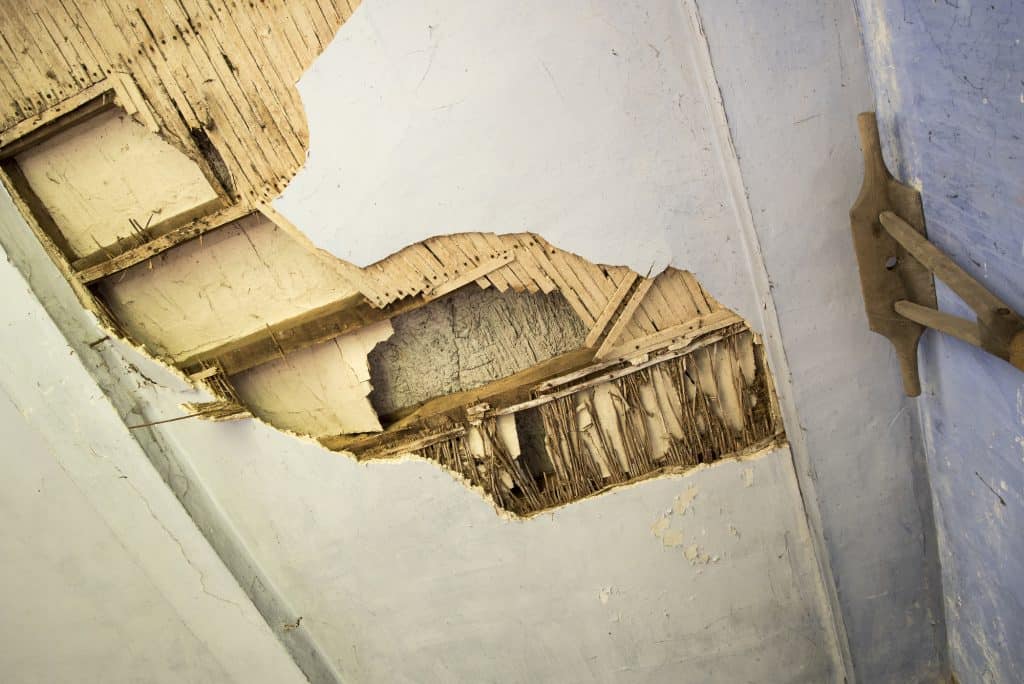
- You might notice a lot of settling cracks in the plaster that are threatening the structural integrity of the wall. You might be concerned that you cannot repair it effectively.
- You could be concerned about the wood rot that is present the lath structure beneath the plaster itself. You might want to replace the wood and plaster at the same time.
- The electrician might have a hard time snaking wiring through the house because the thick plaster is getting in the way of the wires themselves.
- You might have lead and asbestos present in the building that you would like to remove, which you can only get to by cutting through the plaster.
- You might be looking for a way to increase the value of the building and you feel like drywall might be a better investment than the older lath and plaster.
These are a few of the main reasons why you might be interested in replacing the lath and plaster structure with drywall. If you decide to go through with this process, you need to make sure that you do so safely.
Replacing Lath and Plaster with Drywall
If you are ready to replace your older walls with drywall, you may be wondering how this happens. In general, there are two options.
The first option is to simply cover the old plaster by installing the drywall panels on top. This is the cheapest, simplest, and fastest way to do this procedure. Small runs are going to be cut through the original plaster. These cuts are going to take place at the bottoms of the walls. That way, you can install new wiring. Then, you will leave the drywall panels on top of the plaster. The downside of this method is that you are still going to have uneven insulation. Your only insulation option is going to be blown-in insulation.
Therefore, if you really want to replace your lath and plaster walls with drywall, then you need to remove the plaster walls completely down to the studs. Then, you’ll replace it with drywall. How does this happen?
Removing Plaster and Replacing it with Drywall
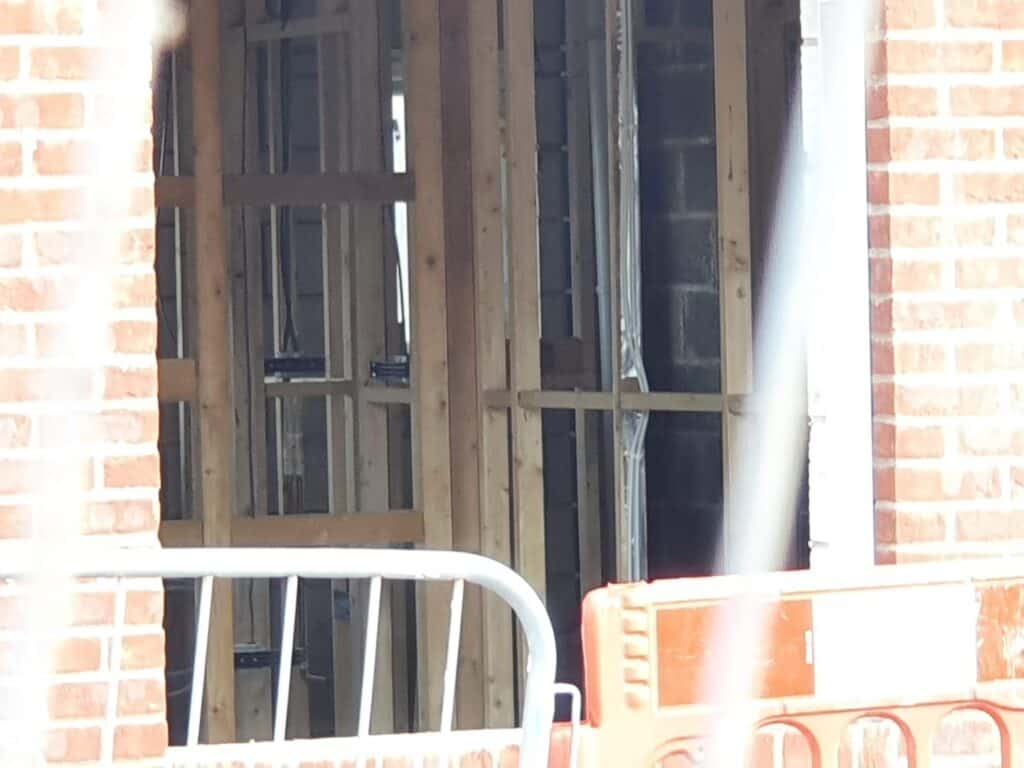
If you decide to completely remove your old plaster walls, you need to make sure the framework is still in good condition. The framework is going to have to support the drywall panel. Or, you can get rid of the lath along with the plaster, making room for a completely new wall.
Even though you may think you can simply take a hammer and demolish it, that is not how this works. There are a lot of safety risks involved, including structural collapse along with the possibility of lead and asbestos exposure. That is why you need to follow several important steps. These include:
- You need to make sure you are plenty of safety gear. This should include earplugs, goggles, and a hard hat. You may also want to wear a face mask to protect yourself against lead and asbestos.
- You should also turn off the HVAC system. Make sure you cover up all air vents to prevent us from Landing in the ventilation system of the building. Otherwise, you could end up with lead and asbestos settling in the expense, harming people when you turn it back on.
- You should also turn off the water and power. That way, you do not inadvertently damage these utilities during the process, and you reduce the chances of suffering an injury.
- Next, you should start working at the top of the wall in the center. Use a crowbar to tap a hole. Once you see the wood framework, use the claw end of the crowbar the drag align down the wall. This is going to be the starting point for your plastic removal.
- As you start, separate the plaster from the lath. Do so horizontally. That way, you can remove larger chunks of plaster. This is going to be more efficient than using a hammer.
- You may need to use a putty knife to separate the smaller chunks of plaster from the frame.
- Once the plaster is gone, make sure you clear the lath of any dust or debris.
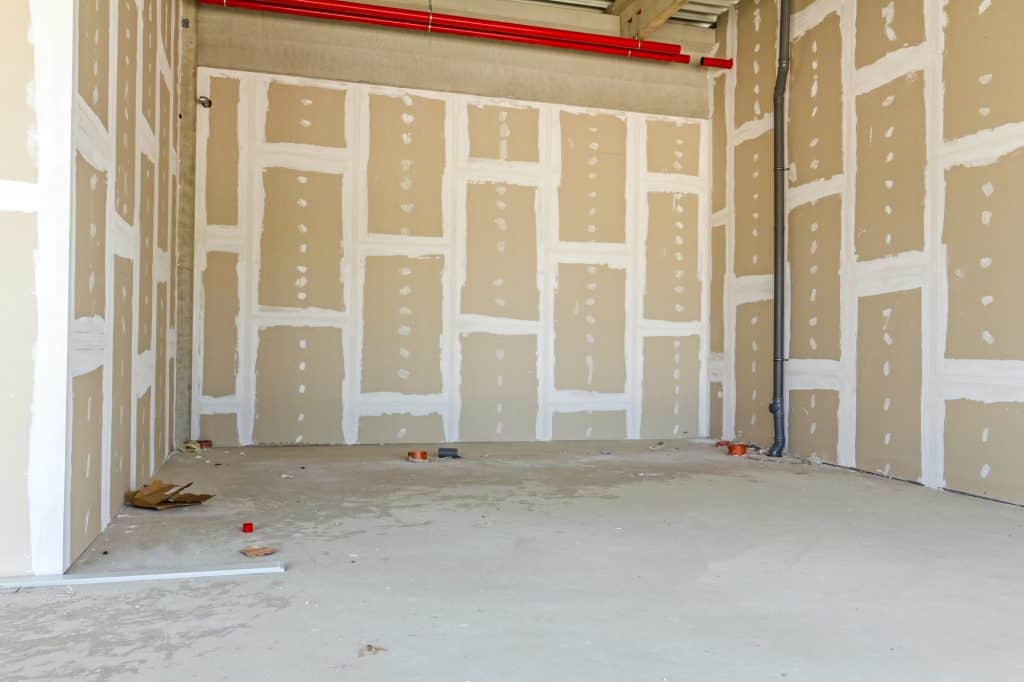
- Then, place a drywall panel horizontally underneath the ceiling. You should make sure the ends of the drywall panels are aligned with the center of the studs in the wall. That way, they will screw in properly.
- As you screw the panel in place, make sure you feel it hit the center of the wall studs. That way, the panels are installed appropriately.
- After this, you should continue installing the other drywall panel. Make sure the ends of the two panels meet in the center of the wall stud. You need to make sure you have as few gaps as possible between the panels. This is important for insulation and the structural integrity of the building.
You should continue following this process until you are done installing panels throughout the entire building.
Replacing the Lath with Drywall
Even though it is faster to simply place drywall on top of the lath that is already there, this is only going to work if the wooden framework is still in good condition. Given that the wooden frame is probably going to be very old, there is a good chance that there is a lot of wood rot present. Therefore, you may want to go ahead and remove the lath itself.
If you are interested in doing this, the first thing you need to do is accept the wall after it has been removed. There are a lot of homeowners who used to leave stuff inside of walls as mementos. You need to remove them before you get started with the rest of the project. Otherwise, they could get in the way when you try to snake wire through the walls later. You might also realize that there are animals that have made their homes inside of your walls. This is something you need to remove before you continue with the project.
You need to make sure you keep your safety gear on as you remove the lath. The wood is probably going to be very brittle if it has been exposed to a lot of wood rot. The splinters can cause serious injuries, and they might even lead to infections.
In order to remove the lath itself, a few steps you need to follow include:
- First, you need to find the timber studs to which the laths are attached. You should start at the end of the lath strips so the wooden planks are removed in a single piece. If the strip ends up breaking as you try to remove it, this is going to be even harder to deal with.
- Next, you need to use a crowbar to pry one end of the lath loose. You need to anchor this against the timber stud in order to truly free the lath itself. You might find that it is easier to loosen multiple strips at once. Then, you can remove them at the same time.
- Finally, you need to think carefully about where you are placing the wooden frames. Your head is probably going to be buried in a wall, and you may not necessarily look for you are stepping. There are a lot of embedded nails that are going to be sticking out. You need to make sure you do not step on them during the process.
This might not be as physically demanding as the process of removing plaster; however, it is still time-consuming and dangerous. After you are done removing the individual wooden strips, you should be able to proceed with the rest of the drywall process. Make sure the drywall is anchored securely using appropriate screws. Otherwise, they might end up falling from the wall without appropriate anchors
The Cost of the Process: What To Expect
If you are planning on doing this yourself, you might be able to save a significant amount of money; however, this is not going to be free, as you are going to have to pay for the equipment and materials. A few factors to keep in mind include:
- If you do not already have the safety gear and equipment, you should expect to spend between $100 and $200 on the goggles, hardhat, earplugs, crowbar, putty knife, hammer, and other materials you might need.
- You should also make sure you invest in lead and asbestos testing before you get started. That way, you are prepared for any safety hazards. Testing for lead and asbestos can cost a few hundred dollars.
- The biggest expense is going to be drywall. Of course, bigger panels of drywall are going to cost more money. You will also have options when it comes to the type of drywall panels you use. Standard drywall panels are the cheapest; however, water-resistant and mold-resistant drywall panels are going to be more expensive. There are even soundproof drywall panels, which are the most expensive.
In general, you should expect a 4 x 8 panel to start at $10 while a 4 x 16 panel will probably start at $15 to $20. From there, you will have to do the math to determine how many panels you need. The larger the building, the more expensive this is going to be.
If you are starting from scratch and need safety equipment, lead and asbestos testing and then the drywall, even a small room will cost $500+. Whereas if you already own all the equipment and don’t need further testing, a mid-size room might just be $200-300 in material.
Why Should you Keep Lath and Plaster?
Clearly, it is doable to replace your lath and plaster walls with drywall; however, you may still be wondering if the price tag is worth it. Ultimately, you should keep your original plaster walls in certain circumstances:
- You are willing to get your walls regularly inspected by a professional. Then, if that professional uncovers any issues with your plaster walls, you are willing to do the repairs. If you are not willing to get your plaster inspected, then you should remove it before it causes damage to your structure.
- You enjoy the benefits of plaster walls including fire resistance, soundproofing, and insulation. If you are really after these benefits, drywall cannot provide them to you. Therefore, you may want to stick with the lath and plaster.
- You have already gotten your older building tested for asbestos and have received a clean report from it.
- You are not willing to pay the price of tearing out your lath and plaster walls and replacing them with drywall.
- You do not want your homes becoming uninhabitable for several weeks as the replacement process unfolds.
- You enjoy walls that are curved or irregularly shaped that cannot be replicated if you decide to remove your lath and plaster walls and replace them with drywall.
If any of these conditions apply to you, then you may want to keep your original lath and plaster walls in place. There are some situations where you may be able to do all of this yourself; however, there are situations where you want to rely on a professional instead.
If you do decide you want to replace your walls, make sure there is no damage present in the building. If there is anything wrong with the structural integrity of the building, then you may want to reach out to a professional who can guide you. It is also important to rely on a professional if you believe there is any lead or asbestos present in the building.
Frequently Asked Questions About Replacing Lath and Plaster with Drywall
A few common questions people have about replacing lath and plaster with drywall include:
The biggest benefit is that drywall is more stable than plaster. Even though settling cracks are going to take place from time to time, drywall usually has an easier time withstanding these cracks than plaster.
It depends on how big the building is, whether you are keeping the wooden framework, and whether you want to do this yourself. It can cost several thousand dollars to complete the process.
It depends on how quickly you work (or how quickly the contractors work), but the entire process usually takes several weeks. It depends on how big the building is and how quickly you can get the materials.